Last Updated: 8/4/2016 Setting the Stage When taking inventory of JSON editors, Visual Studio proper likely isn’t at the forefront of many developers’ minds. Some deem it a brawny dynamo of a .NET […]
Last Updated: 8/4/2016
Setting the Stage
When taking inventory of JSON editors, Visual Studio proper likely isn’t at the forefront of many developers’ minds. Some deem it a brawny dynamo of a .NET IDE that is ill-equipped to support anything encompassing the modern web. Yet, the Visual Studio Web Tooling team has taken great strides to change that preconceived notion. Mads Kristensen’s Microsoft Visual Studio for Web Developers session (watch around the 52:33 mark) at the Ignite 2015 conference definitely changed my opinion. In particular, the team’s gallant efforts have resulted in an IDE extensibility point which invites the open source community to improve JSON support through the contribution of schemas. The upshot is a much more relevant tool for JSON editing.
When I began using Visual Studio 2015, I absolutely loved the fact there was full IntelliSense inside of the most commonplace JSON files (e.g., package.json, .babelrc, etc.). Some weeks later, I encountered a few gaps. My React SPA development demanded the inclusion of some JSON-based configuration files which weren’t yet supported by the SchemaStore project on GitHub. Specifically, I wanted IntelliSense for the .bootstraprc file I was using to optimize my Bootstrap build via Webpack. What I didn’t want to do was litter my JSON file with comments, as this is a violation of the specification.
The time had come to give back to the open source project. What follows are the steps I took to do this. Please do try this at home.
EditorConfig extension for Visual Studio 2015 (for honoring settings in the .editorconfig file)
Step 1: Fork the GitHub project
Think of a fork as a clone of someone else’s repository under your own account. Click the button outlined in red in the screenshot below to initiate the forking process.
Rather than explaining the rest of the process in its entirety, refer to GitHub’s amazingly thorough forking documentation here.
Step 2: Create a feature branch
As a best practice, always create a feature branch from the master branch. This feature branch will be used to implement the schema changes. Let’s create a new feature branch, called “add_bootstraprc_schema”, within the forked repository:
git checkout -b add_bootstraprc_schema
Step 3: Create the schema
Open the solution in Visual Studio 2015, and verify that the feature branch created above is the active branch:
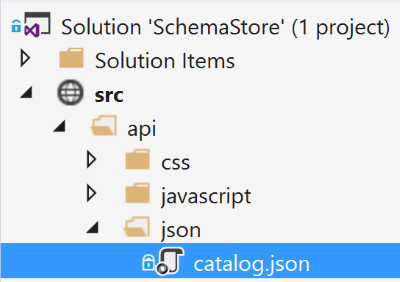
Add a new JSON file to the json folder depicted in the screenshot below. This JSON file will become the schema. The completed schema file is shown here. I had never created a JSON schema prior to finding this project on GitHub, and I learned quickly that it’s not rocket science. This basic example will help immensely.
Step 4: Add the schema to the catalog
The master schema catalog is represented by a JSON file named catalog.json:
Add a new object literal to the file’s schemas array for the schema you’re adding. In the gist below, lines 11-16 were added. Line 14 is critical, as it determines the exact file name(s) to which the schema is applied within the IDE. If the fileMatch property isn’t present in the object literal, the user will be forced to manually associate a schema to the instance document (the JSON file opened in the editor window).
This file contains hidden or bidirectional Unicode text that may be interpreted or compiled differently than what appears below. To review, open the file in an editor that reveals hidden Unicode characters. Learn more about bidirectional Unicode characters
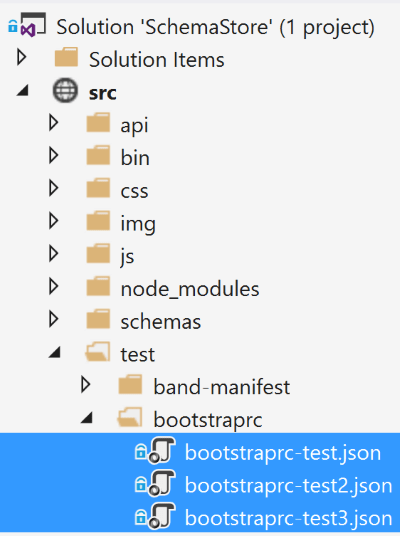
Create at least one test file. I decided to add three so that I could test different variations of the .bootstraprc file.
Step 6: Execute the schema tests locally
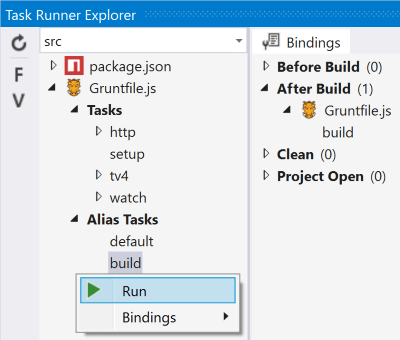
There are a couple of options for testing locally. Either build the solution as you would any other Visual Studio solution, or simply run the Grunt build task via Task Runner Explorer (View -> Other Windows -> Task Runner Explorer):
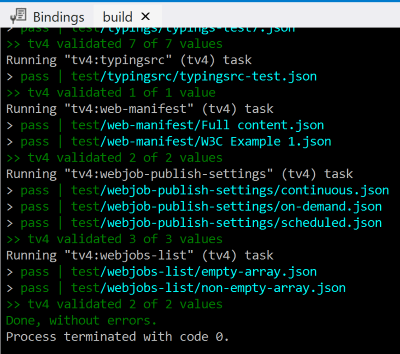
The output from running the Grunt task will appear within the Task Runner Explorer window. Note the “Done, without errors.” message near the bottom of the Task Runner Explorer output. All tests are passing. That’s our queue to continue to the next step.
Step 7: Test the newly-created schema in a sample project
Copy the bootstraprc.json file to %LOCALAPPDATA%\Microsoft\VisualStudio\$(VisualStudioVersion)\Schemas\JSON. With Visual Studio 2015, the $(VisualStudioVersion) property will be “14.0”.
Note the URL-encoded format of the file name in the screenshot above; this is an important detail. Now create a new ASP.NET app in Visual Studio, add a new .bootstraprc file, and test the schema which was created in this walk-through. By the way, the Add New File extension is really useful for adding files beginning with a period.
With the .bootstraprc file open in an editor window, you should see a drop-down with the name of the schema which was paired up with this JSON file. If the aforementioned Schema drop-down doesn’t appear, nudge the IDE by closing the editor window and reopening it.
This was your chance to test the constraints imposed by the schema. If the schema is working as expected, ship it!
Step 8: Prepare a pull request
With all of this leg work behind you, execute the following series of commands to push your changes to the fork:
The actual pull request I ended up submitting can be found here. To read more about creating pull requests, review GitHub’s documentation here.
Conclusion
Don’t let the Git commands above scare you. I find that’s often the biggest barrier to entry on any open source project, or at least it was for me. As an alternative, you could easily use Visual Studio’s first-class Git tooling. I prefer the command line (Cmder) with posh-git, as that’s how I learned Git.
Now that you have step-by-step instructions for contributing to the SchemaStore project, take some time to give back to the community and to help your development team at the same time. If the schema support in Visual Studio 2015 is shoddy, the community is partly to blame. The onus is on you to improve what you deem subpar. I’ll leave you with a relevant quote from Scott Hanselman’s blog post entitled “Open Source is a thankless job. We do it anyway.“:
Why do we do this? It’s not for the glamour or the money. It’s because we are Builders. I encourage you all to get involved. There’s lots to be done.